|
Forms:
Form Wizard
ccpasteur, jstaniek; 2005
The Form Wizard contains two parts: general data source wizard (which will be reused for report wizard in particular), and specific pages for defining forms appearance and behaviour.
Data model
Every bit of data collected by the wizard is stored in KexiFormWizardData class (very structure-like).
^ toc
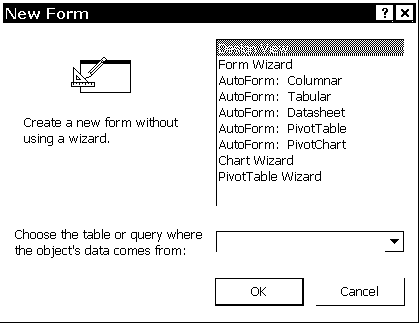
Page 1: Select Form Type and data source
http://kexi-project.org/pics/msa/2_formwizard/formwizard1.png
Instead of diplaying empty 'Welcome' page, we use a page with a list of available types of forms:
- "Create a Blank Form in Design View". Data source will be assigned to the blank form but no widgets will be insereted. 'Finish' button is always enabled here. 'Next' is always disabled here.
- "Create a Form Using Wizard". 'Finish' button is disabled here. 'Next' is always always enabled here (user can set data source on 2nd page).
- "Create an AutoForm" (later this item will be extended to multiple autoform types). 'Finish' button disabled if no data source is selected in the combo box.
'Next' and 'Finish' buttons are enabled depending on the choice made here.
At the bottom side of the a combo box with available tables and queries (data source) is placed. User can select one of these objects.
Reuse notes:
- KexiDataSourceComboBox (already used in Data Source Pane) provides functionality needed for data source selection. We can use the class.
- We don't want to prepend "Define query..." item there, because the wizard is modal so Query Designer couldn't be accessible.
^ toc
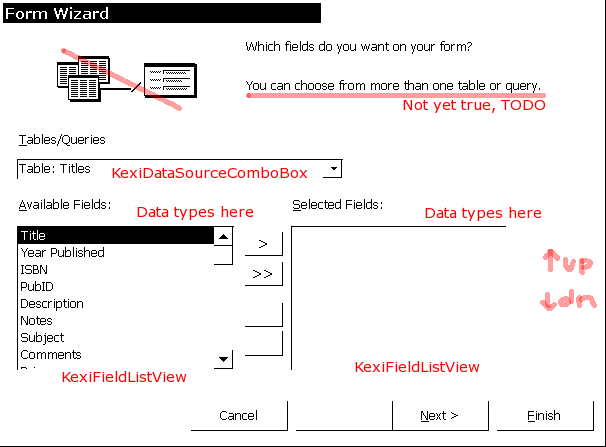
Page 2: Fields selection
This page two lists ('available' and 'selected') allowing the user to:
- select the fields she want to put in the form, using ">", "<", ">>", "<<" buttons
- define ordering for these fields using "up", "down" buttons at the right hand of the page.
http://kexi-project.org/pics/msa/2_formwizard/formwizard2.png
By default no fields are selected. There are also two other buttons to change the order of the fields selected (which should appear in this order in the form).
Reuse notes:
- KexiDataSourceComboBox is here used again, as on page 1, so it may be possible to select a data source if it wasn't performed at page 1. It's convenient as users may want to chage selection (data source) in the combo box to see what fields are available and then change their mind by selecting another data source.
- Implement this page as KexiFieldSelector widget class, so it can be later reused for import/export wizards. Don't add page's informational text to this widget.
- The widget is similar to KSelectAction, but displays both names and types of fields.
- Use KexiFieldListView class (already used in Data Source Pane) for displaying field lists, which supports displaying types and primary key icons. Note that the class already provides dragging: dropping needs to be added.
Notes:
- Drag and drop features for adding/removing fields and changing ordering could be good idea too.
- MSA shows "You can choose from more than one table or query" information text. But is this really easy to use? This is used to automatically build relational JOINS. Users need to remeber how db relationships look like for the database, otherwise, if two or more tables are not related, following error pops up:
- http://kexi-project.org/pics/msa/2_formwizard/formwizard2_err_unrelated.png
- jstaniek: my proposal is to leave the feature as lower priority TODO.
- 'Finish' and 'Next' buttons are disabled if no single field is selected.
- Clicking 'Finish' on this page should create autoform with default style and behaviour.
^ toc
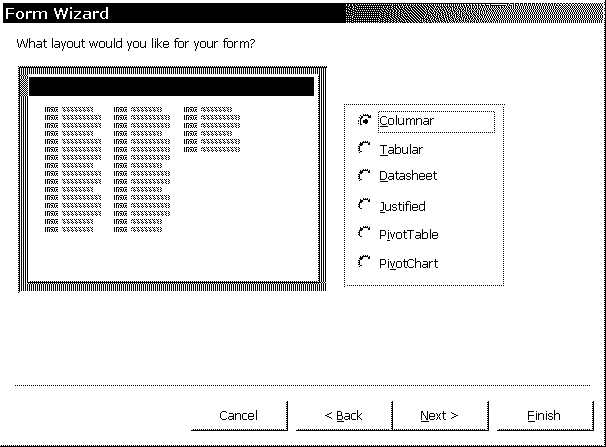
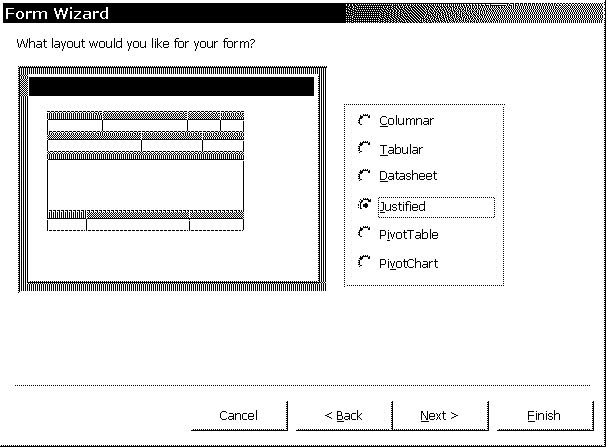
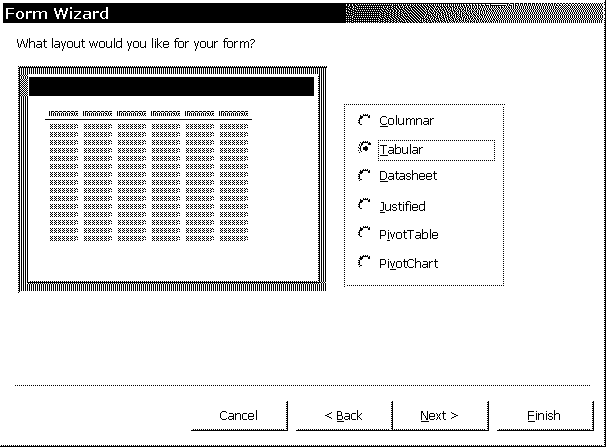
Page 3: Select Form's Layout
(available both for autoform and ordinary form)
Choose the form layout: hbox (then formview vscrollbars will be used if needed), hflow, vflow (the default?).
See:
http://kexi-project.org/pics/msa/2_formwizard/formwizard3_columns.png
http://kexi-project.org/pics/msa/2_formwizard/formwizard3_justified.png
http://kexi-project.org/pics/msa/2_formwizard/formwizard3_tabular.png
^ toc
Page 4: Customize Form's Look&Feel
(available both for autoform and ordinary form)
http://kexi-project.org/pics/msa/2_formwizard/formwizard4.png
This page lets the user:
- choose one of predefined styles. Later, this will be done thx to xml templates, created by the user or downloaded with KNewStuff (kexi 1.2 at least).
Note that after xml templates are available we will need to create similar duplicates of builtin styles.
^ toc
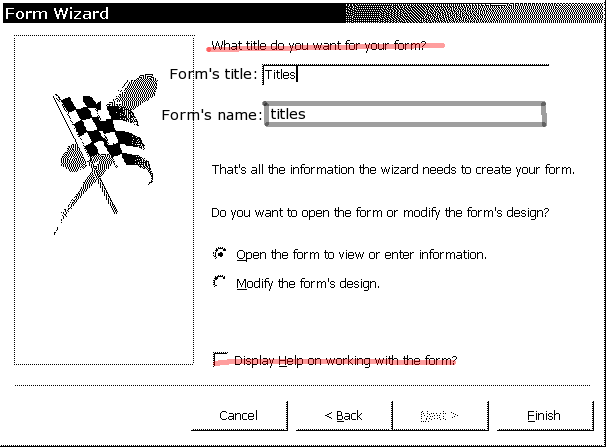
Page 5: Finish page
(available both for autoform and ordinary form)
Message: "The Wizard is about to create a form for you".
http://kexi-project.org/pics/msa/2_formwizard/formwizard5.png
Options provided:
- Open the form to view and enter data
- (this option will save the form before showing it: in most cases it's expected by a user)
- Show the Form Designer allowing modifications
- (this option will not save the form so a user can close the design without any consequences)
|


